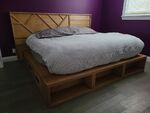
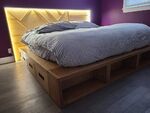
Our oldest son got married about 1 1/2 years ago. As with our middle son I said I would build them some furniture. They chose a bedroom set. In all of the magazines, on line drawings and single patterns I have they did not find anything they really liked. The sent me some pictures of stuff they liked. So this pushed me outside my comfort zone again. They had some requirements. Wanted under bed storage. And no way for their cats to crawl under the bed. Also wanted the frame/stand to extend outside the mattress to all them to put phones and anything else on it. And they wanted electrical outlets on each side to charge phones. Started with the bed. I drew the bed design on graph paper, trying to get the proportions right. There is a formula for that called the golden ratio or golden mean or something like that. I did not take many pictures of the work as I was super nervous as to how it would turn out. Here are a couple of finished pictures though.
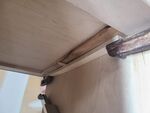
A late addition to the work was lights for the headboard. Found these really cool dimmable strip lights at Lee Valley. There is a touch switch on her side of the bed to turn them on and off as well as the brightness of the lights.
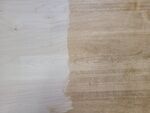
Although it doesn't look like it the wood is all stained the same colour. Not sure why it looks different in these pictures.
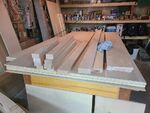
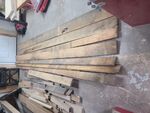
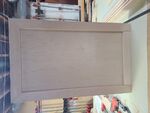
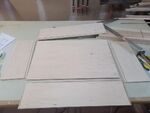
And then on to the dresser. Same program, had to design one as it needed to match the bed. But in this case they had some dimension restrictions so I worked with that. Oh and they had one picture of a dresser they liked so that made things easier. Started with a pile of wood and plywood.
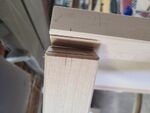
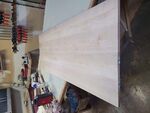
First thing was to make the two ends. Made the frame using 2 x 3.
The joints are made using double biscuits. The groove is for a plywood panel.
Built panel end. Two required.
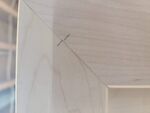
Top joint detail. This is a flush joint at the top of the dresser.
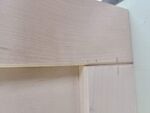
For the bottom joint I did it differently. The picture they sent me did it this way as well. Really happy with the way it is turning out.
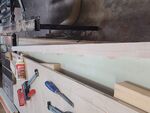
Next step was to make up the front top and bottom rails (stretchers). Using 2 x 3 they were to be connected using double biscuits again. Small chamfer to give it an accent.
From there I made dust shelves to go between the drawer. For this I used birch plywood, because it is more cost effective and won't be seen. Biscuit and glued a strip of maple to the front as that would be seen.
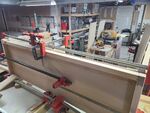
For the top and bottom, to keep things square and strong I biscuited a piece of birch plywood to the top and bottom stretchers. This picture show the start of assembling everything together. That is the bottom part you see.
All glued and clamped up. Had to get creative with clamps and cabinet is 66" ling and my clamps are only 48"
Had a small problem with the drawer slides as there is no backing to secure them in place.
Solved with a piece of wood the same thickness as the gap. In order the get some clamping pressure in the middle I put a spacer, yes a biscuit between the scrap plywood and the filler piece. This allowed me to get enough pressure on the whole filler piece.
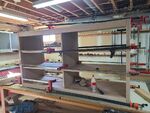
After I had the cabinet together I could then make the drawers. Got these very cool draw slides so everything is based on them. In a perfect world with amazing machines I would have made everything the exact same size. But not quite that way. Some drawers are off about 1/16 -1/8". Not much but enough to affect the drawer sizing. All joint are either dado or rabbit, depending on where they are located. This make the drawers nice and strong. All material is 1/2" Baltic birch.
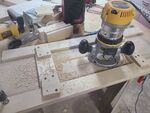
Next step was to make the drawer fronts. In an ideal world you want to make this part out of a single wide panel and cut things down. I could not do that so had to take a bunch of pieces and make them match as best as possible. Glued up and all cut to the same size. Then routering out for the handles Did the same as for the bed and made a jig to hold everything together. The jig is clamped to the front and then routered out the hole for the handle.
And then everything is put together for final fit and finish before coming apart for staining.
In looking at this picture, this is before final assembly. I did fasten the fronts to the drawers to ensure everything fits correctly. Would be the same picture without the center temporary post and shims holding the drawer fronts apart.
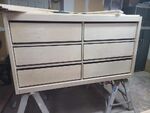
All is good. Taken apart and final sanding done.
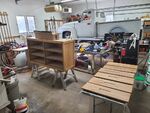
Then getting someone, well my youngest son to help we moved everything into the garage for staining and finishing.
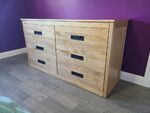
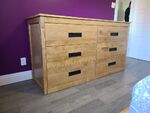
Such a difference stain makes. Really brings out the grain in the wood.
Beautiful bed and dresser. Excellent craftmanship. Wish I could afford to have something made.
Labour is free, well my free time. And we're paying for the materials. We prefer to give them something that way then just handing over cash or something from a store that they can afford anyway.
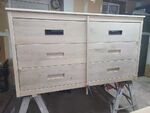
And now for the final installment of this project. Yesterday we took the drive to Petawawa to deliver the dresser. Combined that with a mother's day celebration. They are very happy with this dresser. And I'm only about 1 1/2 years behind schedule, lol. So much for having it done before they got married.