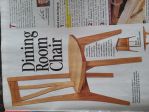
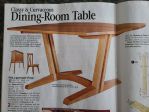
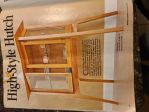
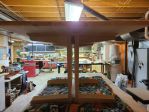
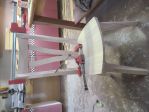
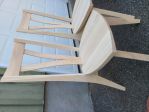
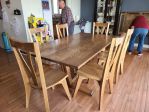
Our middle son is going to be married this fall. Got to thinking about a gift for him. Both him and his girlfriend live on their own so have most of what they need. Thought it would be cool to build them something. Over the Christmas break they came down, we talked about it and they asked for a dining room suite. I have a few designs in magazines and let them go through them or they could pick something else from wherever they wanted. They have picked this suite out. I thought it would be fun to post about it so picked this site as I am not on any woodworking forums anymore. They wanted watch as well. So as that for an introduction here are the pictures of what they picked.
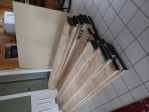
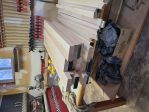
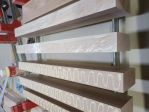
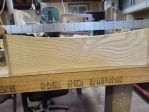
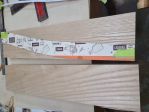
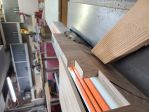
Starting with a small pile of white ash. That is the wood they picked out.
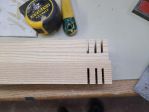
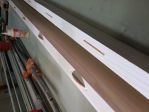
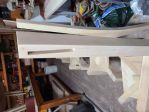
I am starting with the table. Cut out the two vertical parts and cut some holes for the legs to go through. These will be through mortise and tenon joints. Start by cutting out what I could then using a few different tools to see what worked best, drill bits, router, or chisels. Turns out I needed them all.
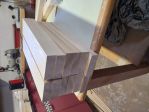
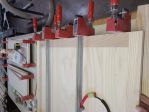
Started work on the legs. Needed to have pieces of wood that were 3" thick. That is hard to get so I glued 2 pieces together. Old saying here, "you can never have to many clamps". this pushed the limit of what I had.
One thing to keep in mind is how wood moves. To help prevent any warping I glued them with the growth rings going in opposite directions.
Once the glued dried there were cut to the final size. From there I had to cut tenons on the one end. Did a few practice cuts first to get the right sizing. This is a good habit to get into when building. Although the cuts look the same, they are each a bit different. Remember when you set up the saw and raise or lower the blade a bit the result is double because you do both sides. You want a snug joint when done. To loose and it will fall apart. Glue is not a cure all.
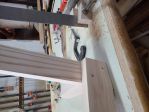
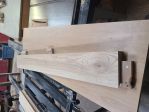
And cut the top and bottom stretchers. These parts will go between the legs. You will see later how it all comes together.
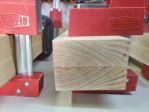
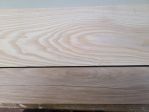
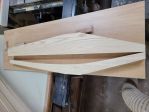
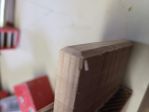
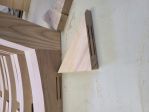
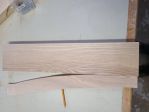
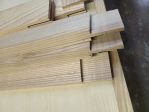
And a fun little side note. Although this is white ask, it can have quite the colour range. This picture is from the same board, I just flipped the one piece over to show the different colours.
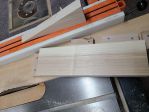
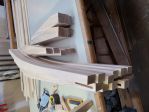
The drawings call for a 15 degree angle on the legs and table supports. The table saw gauge is not that accurate so I used the miter saw, made a 15 degree cut and used that to set the angle needed
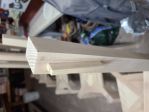
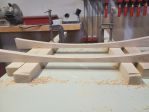
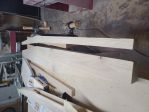
Parts cut and shaped
Then things get fitted and glued together . Needed 4,just like this
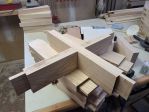
Then mocking up all the parts I have cut and shaped so far
Starting putting things together. Instructions say to glue things together but gluing cross grain wood doesn't work well. Ended us screwing the cross pieces to the legs
Second side added. For this it was an angle screw to attach things together
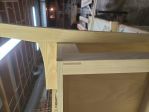
Glued on some top and bottom caps
The table frame is upside down in this picture. If you look at the piece that is on the ground you will see some holes on the piece touching the floor. They are holes to screw the top onto afterwards. The one hole you see need the top of the picture is slotted. That is to allow for expansion and contraction of the wood. The center of the table will be screwed tight but at the outside edges is will be able to move a bit. Should not crack that way.
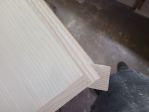
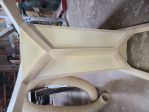
More pictures. It is the little things that count. The bottom plate I put a chamfer on. Should look like the table is floating a bit on the floor
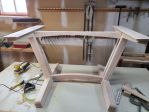
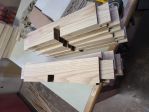
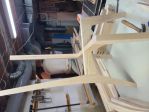
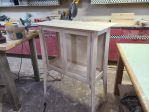
Frame is done, ready for finish.
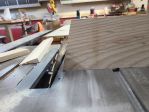
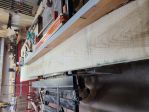
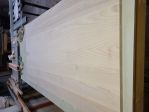
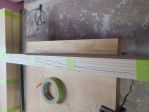
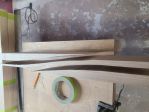
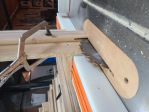
Next step is to make a top. It is hard to get wood that is perfectly straight so you need to figure out a way to make it straight. I have a straight edge that I will fasten wood to. Helps get things close. That is the oak piece that looks like an old door frame.
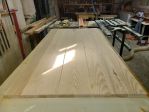
After much recutting, planning and jointing I got some boards that will work. Still over sized at this point. Then I laid them out moving them around until I had a pattern or "look" that I was happy with
In order to stop the lage panel from cupping you need to alternate the grains so one cups up and the next one down
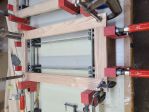
Because the top will be 38-39" wide it will not fit through my planner so things get numbered and glued up in smaller panels that are less than 12" wide. From there I will cut and glue them into one large panel. To help with keeping the panels flush or close I used a biscuit jointer and biscuits to help with that.
And now we wait for the glue to dry before planning and taking each sub panel and gluing into one large panel. With the Ontario government allowing us to go back to playing sports and my hot rod coming back, things on this will slow down a bit but will try to get some work done.
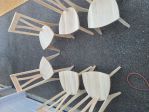
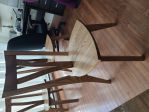
Now that the table is done it was time for a new challenge, opportunity to develop. Six chairs are part of this project. This will take some time. Started with the legs, cutting them to the correct sizing but square.
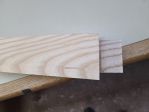
The front legs are all straight cuts but angled. When doing a bunch of stuff all the same it is best to build or use a jig of some sort. For this I used a piece of melamine particle core that I had left over from another job. Added some scrap blocks of wood to hold the piece in place, then through the table saw it goes. Picture also shows how different the colour of white ash can be.
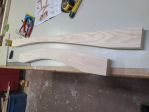
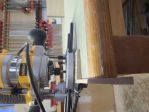
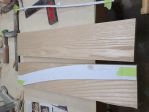
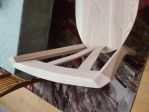
The back legs are much harder. The fronts of them are straight cut so the same procedure is used. For the backs of them, they are curved. Laid one out and cut it. Took a couple of go rounds to get is smooth and shaped nicely. Cut on a band saw. Shaped using a variety of sanders. Picture gives you an idea of how much the arch is. Once I was happy with the first one, I used it as a template for the rest of them.
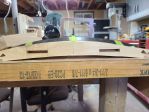
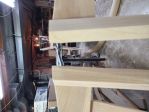
Then you end up with a pile of sawdust and wood chips. And a pile of scrap wood. Then a stack of legs.
Picture of a front and back clamped together to see how it turned out. Angles match perfectly, that is good. I will build a stretcher to go between the two legs next.
Now that the legs are done it was time to build the parts to put them together. Again lots of planeing and cutting. That along with an increase in other stuff I need to do has slowed progress down.
You will see that there are two different types here. That is so they intersect each other.
Glued the stretchers to the legs.
A little trick here. if you cut off the ends of the tenons just a bit it will give the extra glue someplace to go. Also makes assembly a lot easier
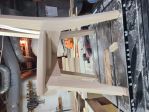
And a mock up of one set
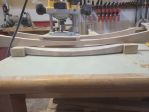
This picture shows it a bit better but the stretchers have now got an arch on the bottoms. That was cut after all the notching and tenon work was done.
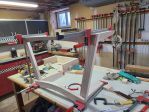
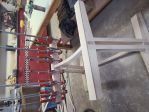
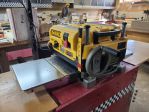
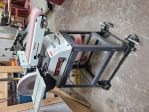
Not sure how this happens. I asked a guy who is a woodworker and computer nerd and he laughed at me. I have been wanting a belt disk combo sander for a long time but could not justify buying one. For this project it would be super helpful. Then google must have been reading my mind as an ad showed up for one on sale at Busy Bee. Talked to my wife and then I bought it, price was good.
Got it all set up but that is as far as I got for a couple of weeks. Then go to use my planner and nothing, no movement, no noise just dead. took it apart and tested as far as I could. The motor was done. Crap, just spent money on the sander and now I need a planner. What to do. Talk to my wife again, she is not impressed this time. After talking and looking, Busy Bee had this one on sale. Back I go. This one is a lot quieter and works better. Oh well, less inheritance money for the kids and my hot rod.
This is well on it's way to being oustanding Martin. I cannot wait to see the finished product. Or is that Finnish????
Just raw wood for now. I've given the kids some stain samples so they could look around and pick a color if they like. Might do a the finishing at the end. The clear finish has a strong smell so may do it in the garage.
Marten: you are a master of many talents for sure.. I am amazed with what you can do with wood.. when I was younger I used be able to have a woody, I never got any slivers from it..
__________________
There is no elevator to success — you have to take the stairs.
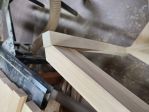
To help reinforce the chair legs I made up these triangles and added biscuit slots in them. Made matching slots in the stretchers of the legs.
Glued them all together.
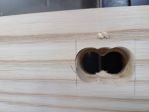
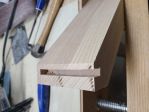
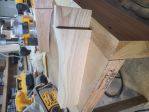
These hole are called mortise and were cut earlier, before putting things together.
They will have a "loose" or "floating" tenon put in them. Not sure why the name as they have to be snug and are glued in.
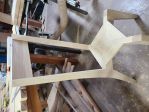
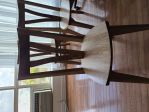
Next was to cut the upper backs and start making things fit together. More cutting, planing, etc. Once that was done they have to fit perfectly between the legs. A slot was cut to match the floating tenon.
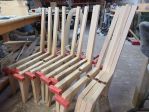
And a test fit.
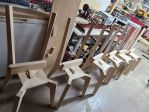
The backs will be cut rounded before assembly, not very comfortable like this. There is also some other steps to take before this stays together forever.
What are you using for glue? Tightbond II, III OR another brand?
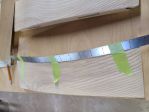
I like Lepage, carpenter glue, the yellow stuff. The key when gluing is not to use much. Here is a picture of how I do edge glue ups. Put some on, then spread it, I use my finger then clamp right away. You only have a couple of minutes once you spread it. To much glue makes a weak joint.
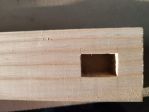
A little step but a challenge. Needed to cut in mortise holes in the bottom of the set backs. Later you'll see how this comes together.
Looks simple but, they needed to be on a 5 degree angle. This is so later the vertical bars go in and conform to a person's back. Made up a couple of pieces of wood cut at 5 degrees and two way taping them to my router. The ends get cut with a chisel.
The next step in making the back part is to cut it in an arch. This gets tricky because it is curved both side to side and on top. Cutting the side to side is straight forward enough as long as you have a way of drawing a curved line. If you were to put your head on the seat and look up this is what you would see.
The top is also curved and that gets harder. I have an 18" steel ruler that got put to use for this task. First layout the sizing you need, then connect the edges to the middle.
Once it is marked out you can cut it, I used a bandsaw for that. In order for the piece to stay flat on the table I took one of the cut offs and taped it to the back part and had the scrap piece touching the table.
After cutting.
And off to sand everything now. I like to sand as I go. It is really boring to sand but needs to be done well to have a great finish. So I cut a bit, sand a bit and repeat.
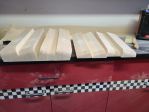
The next step is making the seat. Glued a bunch of boards together and cut to an 18" square. No pictures of that but betting you know what that looks like. Then to dish out the center for the bum. Made a pair of runners like this.
Then made a slider like this.
Putting the two together.
Going down a bit at a time you eventually get a seat
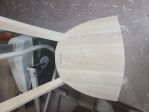
Then from square to something with more shape and a lot of sanding you end up with a chair seat
Now that the seats are done the next step is to make the back supports or spindles, not sure what else to call them. Started with a pile of square stock that I milled to the correct size.
When you have a bunch of the same thing to make the best way is to create a template first. In my case I needed rights and lefts so flip the template over and that works.
These had to be compound cut. I didn't take a picture of the other template but same concept to create a 3D item.
You then cut it one way first.
Save the off cuts so you can tape them back on to cut the other way.
Then you have a small piece left and a lot of designer firewood.
I ended up having to upgrade my dust collection system with some more fittings and hose. The band saw leaves a rough cut and generates some dust but sanding to get these smooth created a lot of dust. six chairs with two of these items each.
Glued on the chair
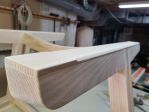
Some trimming and and beveling of the legs and were almost there.
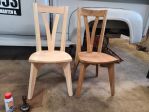
Did some test sitting to see how they feel. Found out there needed to have a bit more back slope on the seats. After some testing, I determined that cutting 3/4" off the back legs worked great. You need a perfectly flat surface to do this. It will also help make sure the chairs don't rock when on a flat floor. Put 3/4" block of wood on the front and then set a 3/4" block beside the back legs and marked it for cutting.
Final sanding touch ups and they are done. Ready for stain and finish once all the stuff is built.
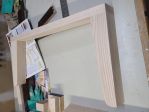
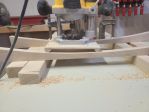
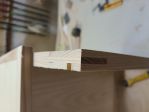
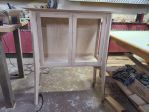
After the panels were made, I started on the sides and doors. There all made the same, but different sizes so the steps are the same. First cut the wood to the correct size. Next is to join things together. For this I used a bridle joint. Started by making a jig to hold the wood while cutting it. Looks like this
And in action
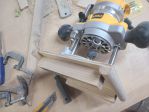
Then cut the male portion. Used a router table for this
Glued and clamped together
The finished joint
Once everything was made, I wanted to see how things fit together so I did a mockup. Not glued but fitting well
While that is drying I made up a panel for the top. Not much to see so no pictures. However the edges required a 15 degree bevel. That is much more interesting. Started by angling the blade on the table saw. Did a test run with some scrap wood. Thought I had a picture of the top being cut but can't find it.
Next onto the legs. They start out square but get transformed over several steps. Part of that involves making a mortise for later and a V groove. Did those steps first
Then one part gets a taper cut. Using a jig for this is helpful. Jigs can be made from anything. In this case I used some particle core plywood and screwed some blocks to hold the wood in place.
Back to the band saw for more cutting and shaping and we have a leg. Needed four so just read this 4 times and you will have them all.
Next is to add some bracing to hold up the cabinet with the legs. That is the tenon for the mortise you seen earlier.
Glued to the legs. Looks short now but you will see how it goes soon.
Now glued to the cabinet. Remember all my fancy bridle joints from earlier. You can see them in the picture above as well. They are all getting covered up now.
This is the top view showing how the leg v groove cradles the cabinet.
And a view from the bottom. Added a stretcher in the middle to connect it all together.
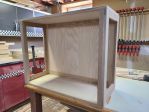
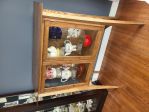
Top screwed on, doors screwed on and we have a cabinet. For the top you need to allow for wood movement. Made some oversized holes in the cabinet then screw the top in place.
Most of the wood gets sanded as we go but always some final touch ups and minor adjusting to do but now together.
That now turns about 300 board feet of white ash into, maybe 18 bags of sawdust and something that looks like a dining room set. Along with some glue and hardware as needed.
Next step is to start staining and clear finishing it. Then glass goes in.
Thanks for checking in. Hope you are enjoying the ride.
Thanks Pugsy Thought I would show you this one picture. Shows how the first chair looks after staining (as well as a very sick hot rod on stands in the background). It will still come more to life once it has the clear finish on it. Colour is English Chestnut by Minwax. Will have a satin clear on top.
Thanks pugsy.
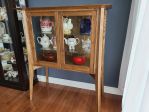
This will be the last post until I can deliver the set to my son and his soon to be wife in mid October as the finished project look will be a surprise.
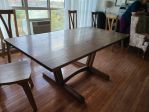
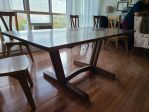
The wonderful couple got to see their set yesterday. I am super happy with the way it turned out. Now everyone else can see it as well. The final total for those that want to know. 240 hours of labor, 300 board feet of white ash, 1 sheet of white ash partical core plywood, 1 liter of stain, 1 1/2 liters of clear finish ,some misc hardware, 4 pieces of glass and a trip to Cambridge.
Our middle son is going to be married this fall. Got to thinking about a gift for him. Both him and his girlfriend live on their own so have most of what they need.
OK, then, if you're taking the pictures and that's your middle son in em, how friggen old are you man?
Our middle son is going to be married this fall. Got to thinking about a gift for him. Both him and his girlfriend live on their own so have most of what they need.
OK, then, if you're taking the pictures and that's your middle son in em, how friggen old are you man?
Lol, that was hilarious.
That is my mom and dad. Had them show up because they don't do computers. They were impressed as well