Members Login
Username 
 
Password 
    Remember Me  
Post Info TOPIC: Marten's '53 Ford pick up


http://lightspeedmetaldesign.com/

Status: Offline
Posts: 307
Date:
Marten's '53 Ford pick up
Permalink  


Looks good Marten.
Make sure you have a backer plate for the sticker pin.


__________________


Carleton Place On Rod-Side Member

Status: Offline
Posts: 237
Date:
Permalink  
 

Looking good, lots of progress there.


__________________

Carleton Place, ON. 57 B/A wagon, 355/ 700R4,71 Nova 355"SB, 51HenryJ.
www.picturetrail.com/sfx/album/listing/user/henrys57wagon


Kemptville Ont Carpenter/Renovations

Status: Offline
Posts: 582
Date:
Permalink  
 

Lightspeed Mike wrote:

Looks good Marten.
Make sure you have a backer plate for the sticker pin.


 Yup. Got the complete set from the car.


__________________

Building my dream one piece at a time.


Tin basher Metal shaping guy

Status: Offline
Posts: 414
Date:
Permalink  
 

Marten wrote:
123pugsy wrote:

Thanks for the update. Fun stuff you're doing there.
Never be nervous about cutting into metal. You can always put it back and get the shape back.


 Thanks Pugsy.  It never seems to come back the same way for me.  Hoping that as long as it is close, bondo will make it right.  You know lots more about this stuff then me, hoping I am doing things right. 


The key is to stretch the welds back with hammer on dolly. Just don't over do it. It's harder to shrink back then stretch more.

It never comes out perfectly unless you spend a million hours on it.

Bondo is your friend. I'm at the point where a 1/16 to an 1/8" bondo will be fine for me. Otherwise, my rod will never be done.


__________________

PUGSY


Kemptville Ont Carpenter/Renovations

Status: Offline
Posts: 582
Date:
Permalink  
 

Earlier I showed what I did with the headlights.  In the body work section I left a question on how to shape the air dams that sit right behind and attached to the grill.  Needed to create a hollow area behind the lights.  So it was time to try something.  Started by cutting 3 pieces of plywood with 5 1/2" holes in them.  Two pieces for the back side as I needed to get it to hollow out at least an inch or so.  And one for the front to clamp it all together.  Screwed the pieces together through existing holes in the air dam.

IMG_20200408_102418.jpgIMG_20200408_102432.jpg

Next was to grab a hammer.  Had several to chose from.  Started with the rubber one but ended up using the carpenters 20 oz model.

IMG_20200408_102330.jpg

And then the beating begins.  Was not sure what would happen here but after much beating I got about 1 1/4" hollow out of it.  That was enough for me.  Test fitted everything and it looks great.  No pics yet because I have no fasteners to hold it all together.   Interesting note here.  On the first one after some pounding I tried to heat up the metal.  Made a smoky mess and decided to stop as I was not sure what would happen to the metal.  That one I ended up with a slight crack in it, about 1/8" long.  Welded it up to seal it.  The other side I did not us any heat and it worked great, no cracks.

IMG_20200408_113740.jpg

Thanks to 123Pugsy for the encouragement to try this stuff.  Sure helps to have a guy that knows something and is not afraid to show us how.


Attachments
__________________

Building my dream one piece at a time.


Tin basher Metal shaping guy

Status: Offline
Posts: 414
Date:
Permalink  
 

Glad to help.

You done good.

__________________

PUGSY


Tin basher Metal shaping guy

Status: Offline
Posts: 414
Date:
Permalink  
 

I was just looking at your pics. If you do this again, next time, set your jigsaw at 45 for the top piece and you'll get more knocking clearance.

Looks like I did about 30° on the piece in the pic:

IMG_0581.jpg


Attachments
__________________

PUGSY


Kemptville Ont Carpenter/Renovations

Status: Offline
Posts: 582
Date:
Permalink  
 

With this shut down I have gotten a lot more shop time.  Doesn't show but I am working more on it.  That goodness for the internet as well.  Spending way to much time looking up stuff and solving little problems.  Got my peddles and column installed.  The steering shaft was tight between the header and A arms but I did it.  After solving my alignment issue with the steering wheel it all worked great.

IMG_20200421_124242.jpg

IMG_20200421_124109.jpg

You may have seen something similar to this pic already.  I got all the front sheet metal together.  This way I can see what I am missing.  Spent a lot of time sorting out the correct fasteners.  Ended up ordering them locally as shipping was to expensive from the US.  Was watching a show this week that says they had the truck together and apart at least a dozen times before paint.  I can start to see that now.

IMG_20200425_101849.jpg


Attachments
__________________

Building my dream one piece at a time.


Kemptville Ont Carpenter/Renovations

Status: Offline
Posts: 582
Date:
Permalink  
 

Now that the truck is together I decided to start taking it apart again.  Stripped the paint off the fenders on the outside to get ready for epoxy primer.  Also had some stuff I made and never coated in epoxy so thought I would do that at the same time.

IMG_20200426_112005 (2).jpg

Today was primer day.  Washed everything with a metal primer.  Then sanded it all.  Wiped down and then primered.  Got a new spray gun a while ago.  Works way better then my old one.  Now it is all grey, ready for bondo tomorrow.  Any tips on that.

IMG_20200426_160317 (1).jpg 


Attachments
__________________

Building my dream one piece at a time.


Tin basher Metal shaping guy

Status: Offline
Posts: 414
Date:
Permalink  
 

Thin coats.
Use a guide coat.
Long flexible sanding board. I got a set that has removable steel rods for adjusting flex.
Paint stir sticks work well. Dowels for inside radii.
Wear a glove to feel how it's going. Or slide a rag over the area to "feel" it.

__________________

PUGSY


http://lightspeedmetaldesign.com/

Status: Offline
Posts: 307
Date:
Permalink  
 

What did you use for primer and spray gun?
I have to find something doesn't put the runs in the panel.


__________________


Kemptville Ont Carpenter/Renovations

Status: Offline
Posts: 582
Date:
Permalink  
 

The spray gun is a King brand. Comes with a 1.4 and 1.7 tip. Using the 1.4 tip. Whatever that means. He says that a lot of body shop guys use them They are cheap and when they mess up you toss them and buy another one. Not good enough for finish paint though. I have used a couple of different brands of primer. I get the stuff from a company called ABS or Auto Body Supply in Perth. This was the last of the brand Pro Form I have. Next round will be Montana brand. I trust this guy to give me the right stuff. Great guy to talk to. His dad was a body guy. He (Reg) did not want to be a body guy but ended up starting a body shop supply company. Does very well. Operates out of a shop attached to his house in the middle of no where, dirt road and all. May also look at putting bed liner on the insides of the fenders and under the cab now as well. Getting good recommendations for Dominion Seal from Canadian Tire. You can get a special gun,Schutz brand as well.

__________________

Building my dream one piece at a time.


Kemptville Ont Carpenter/Renovations

Status: Offline
Posts: 582
Date:
Permalink  
 

Not a lot to show but did manage to get the inside of the fenders and bottom of the cab sprayed in bed liner this past weekend. 10 hours of taping and then 2 hours of spraying. Let is dry for a few days and now ready for whatever hits it. Thank goodness for nice weather.  i should have taken the tape and plastic off right away.  Hope someone can learn from that.

IMG_20200523_120506.jpg

IMG_20200523_120518.jpg


Attachments
__________________

Building my dream one piece at a time.


Kemptville Ont Carpenter/Renovations

Status: Offline
Posts: 582
Date:
Permalink  
 

Been working on the truck slowly. Heat is slowing me down as I have had to do some work outside. Not much to show for the effort involved though. Worked on stripping the cab to bare metal.

IMG_20200607_130326.jpg

After stripping and washing down with Metal Prep.  Leaves a surface coat of flash rust.  That gets sanded down/off with 120 grit.

20200726_162203.jpg20200726_162133.jpg

And into epoxy primer.  Learning how to spray primer.  Figured out that 2 thin coats sprayed 15-20 min. apart are better then one thicker coat.  Getting better but still some runs.  Now I really see where the dents and dings are. disbeliefno 
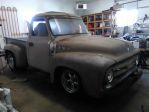
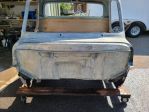
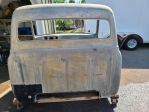
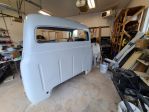
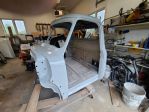
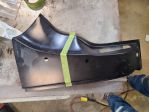
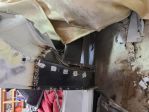
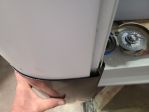
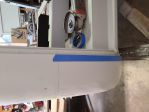
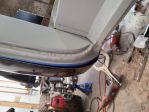
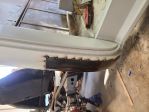
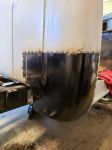
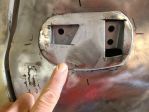
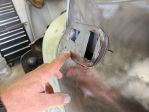
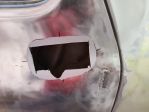
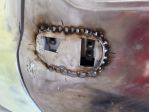
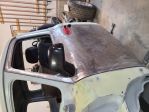
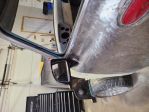
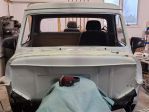
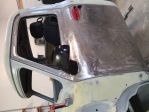
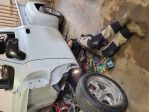
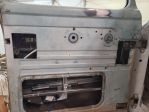
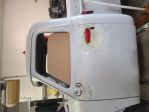
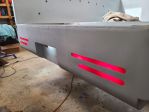
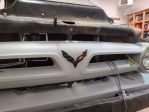
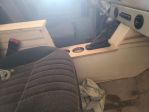
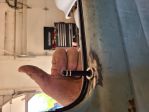
Got some body work ahead of me for sure.  Will work on that but may leave some of it for later.  I want to get the cab on so I can start moving forward on some other work.
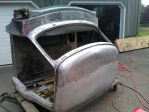
20200802_122002.jpg20200802_121934.jpg


Attachments
__________________

Building my dream one piece at a time.


Tin basher Metal shaping guy

Status: Offline
Posts: 414
Date:
Permalink  
 

Looking good Martin. Getting into primer is a great step forward.

__________________

PUGSY


Race starter St.Thomas Drags Rod-side Aylmer On Member

Status: Offline
Posts: 1409
Date:
Permalink  
 

Taking shape now with some colour,primer beats rust!  Looking good Maren!


junior


__________________

Government is a broker in pillage, and every election is sort of an advance auction sale of stolen goods. HL Mencken. 1919.

"If you want a vision of the future, imagine a boot stamping on a human face - forever." George Orwell 1984


Kemptville Ont Carpenter/Renovations

Status: Offline
Posts: 582
Date:
Permalink  
 

It has been interesting. When I have not worked on it for a bit, it seems hard to get going. Once I get started it is hard to stop. Got it on the frame today. Has me very excited again. Now I can move forward with some other stuff. I really need more space.
Thanks guys for the comments, sure helps me.

__________________

Building my dream one piece at a time.


Kemptville Ont Carpenter/Renovations

Status: Offline
Posts: 582
Date:
Permalink  
 

Continue to work away.  Not much for picture though, not very interesting.  I decided to go ahead and replace the passenger side lower cab corners.  After stripping the paint off they were a lot worst then I knew.  Ordered some new corners.  The front one did not fit well but it was close but not close enough.  The top of the panel was wider then the original truck was.  I decided to cut it down and hope it fit better that way.  If not there was less metal to rework.

20201005_115341.jpg

Worked out better then I expected, happy dance.

20201008_203003.jpg

The rear was another story all together.  Held the new panel to the old and found this.  It is at least 1/2" wider then the original truck panel was.

20201010_142650.jpg

After thinking, I decided to cut the old panel out beside the bends and hope I could make it work.  Using tape as my guide, the first cut was the hardest.

 20201010_142735.jpg

Cut and shaped the new panel until I got back to the beginning.  Started at the back as that fit reasonably well.  Then I had more problems.  The bottom was larger then the original panel, again.

20201011_110758.jpg

More cutting, more shaping, more of everything and it finally fits.

20201011_165740.jpg

All tacked in, ready for final welding, one dot at a time.

20201011_165748.jpg


Attachments
__________________

Building my dream one piece at a time.


Campbellford On Rod-side Member Licence Plate restoration Chris Stapley Kustoms For U

Status: Offline
Posts: 187
Date:
Permalink  
 

All coming together nicely Martin, its going to be a very nice truck when completed..

__________________


Tin basher Metal shaping guy

Status: Offline
Posts: 414
Date:
Permalink  
 

Damn....excellent fit.

__________________

PUGSY


St.Thomas On Rod-side member

Status: Offline
Posts: 495
Date:
Permalink  
 

Where did you get the ill fitting panels, Martin??

__________________

if you don't like the way I drive, stay off the sidewalk.


Kemptville Ont Carpenter/Renovations

Status: Offline
Posts: 582
Date:
Permalink  
 

parklane wrote:

Where did you get the ill fitting panels, Martin??


 These panels came from MidFifty. The ones on the drivers side were from LMC. Those fit much better. However, the driver's door gap is to big for my liking. I'm not sure if it's the truck or the panels. All the reading I've done says it's the panels but I have no way of checking that. I know that these older vehicles all have the same issues. Could be older technology versus today's technology. A great way to test my skills though. 


__________________

Building my dream one piece at a time.


Kemptville Ont Carpenter/Renovations

Status: Offline
Posts: 582
Date:
Permalink  


I did not like the original side view mirrors that come went on a '53 so I went for a walk one day at the local pick and pull yard. Not sure what I wanted but it had to be smallish and had to fit and slope of the truck door. Happen to stumble across a set of mirrors from a Kia. I know, I know, I'm ducking now hope none of that stuff is hitting the computer screen.

20201023_084859.jpg

Was not sure how to mount it, had to work with power windows.  Tried a couple of ideas, then had a family vote.  This one won.  Sorry you don't get to see the other ideas, there not as good.  There is the face part that the mirror mounts to and a backing plate to hold the mirror to, if that makes sense to you.

20201025_112053.jpg


20201025_112102.jpg

Had to cut a hole in the door.  That was scary, cutting a really good door up.  At this point I really was taking a guess that this was going to work.  But failure was not an option.  Cut a hole.  This pic is from the other side but same idea.

20201025_163433.jpg

Welding in progress.

20201025_141641.jpg

Welding done, ground down.  Mirror mounted.

20201026_153355.jpg

20201026_153405.jpg

And then the passenger side got done.

20201026_160448.jpg

20201026_153420.jpg


Attachments
__________________

Building my dream one piece at a time.


Race starter St.Thomas Drags Rod-side Aylmer On Member

Status: Offline
Posts: 1409
Date:
Permalink  
 

Nice work Marten


junior


__________________

Government is a broker in pillage, and every election is sort of an advance auction sale of stolen goods. HL Mencken. 1919.

"If you want a vision of the future, imagine a boot stamping on a human face - forever." George Orwell 1984


Tin basher Metal shaping guy

Status: Offline
Posts: 414
Date:
Permalink  
 

Looking good, even for import mirrors.

__________________

PUGSY


Kemptville Ont Carpenter/Renovations

Status: Offline
Posts: 582
Date:
Permalink  
 

20201115_122618.jpg


Attachments
__________________

Building my dream one piece at a time.


Kemptville Ont Carpenter/Renovations

Status: Offline
Posts: 582
Date:
Permalink  
 

Been working on the AC system in the cab. Using a Vintage Air system. They call it Sure Fit but you need a variety of lubricate and shoe horns to get it all to go. Not done but did get a mock up done with the dash extension in place.

20201220_154732.jpg

From the back window.  All the switches and such are in place for now.

20201220_154917.jpg

Hoping to have more time this winter. lol.  No curling but other things keep popping up as well.  Got lots of parts ready to go.  The blue rectangle is the potential spot for a radio of some sort.  If it doesn't fit there I will put it in the console or create some sort of overhead mount for one.  Depends on what kind I get.


Attachments
__________________

Building my dream one piece at a time.


http://lightspeedmetaldesign.com/

Status: Offline
Posts: 307
Date:
Permalink  
 

Looking good. The console could use a little more defining. You could build it right up to the dash extension and put the radio there. You won't have to cut the nice smooth dash that way.


__________________


Kemptville Ont Carpenter/Renovations

Status: Offline
Posts: 582
Date:
Permalink  
 

That is a possibility as well. It will depend on what I get for a receiver. Really only need AM/FM receiver with a connection to my phone. Not using CD's any way. Need to balance the look out, don't want anything to big or modern like you see in all of todays cars. Console will go up to the extension for sure. I wanted to make sure the controls for the AC were centered to the shifter as well as the truck as a whole, hence the cardboard

__________________

Building my dream one piece at a time.


Kemptville Ont Carpenter/Renovations

Status: Offline
Posts: 582
Date:
Permalink  
 

Got the condenser mounted along with the dryer. Everything fits, just.

20201229_142339.jpg

Been working on a lot of little things.  Hard to take pictures of some stuff.  Had one of my kids over for a few days, so put them to work.

20201225_113402.jpg

A few years ago I picked up some trees from my father in law that he was cutting down.  Had them cut into boards and left them to dry.  So I took these ones

20201228_104826.jpg

Cut them down.  From here they will sit for a bit to allow them to detension.  Sometimes after you cut wood, although it has dried it will still warp.  So now they look like this.  Some interesting markings in them. Not sure what I am going to do yet.

20201228_135525.jpg


Attachments
__________________

Building my dream one piece at a time.


Kemptville Ont Carpenter/Renovations

Status: Offline
Posts: 582
Date:
Permalink  
 

Started working on the side windows.  I like the look of the one piece glass better then the vented window the truck came with.  Bought a kit for the windows and a matching power window kit.  Thought that would make things easier.  After much reading, rereading, double checking I got it to work.  I had earlier cut an extra hole in the door so I could get the latching system in, that turned out to be a big help.

20210101_164305.jpg20210101_164251.jpg

Testing to make sure everything moved as it should.  Used some cardboard as a window.  That way I am not taking any chances with glass.  That turned out to be a smart move as it took some figuring to get things right.

20210101_120240.jpg

Last step is the fuzzies, had a hard time getting the shape right.  Ended up making a template and bending them to suit the template.

20210101_164233.jpg

Passenger side is next.  That should be faster now that I have an idea what I am doing.


Attachments
__________________

Building my dream one piece at a time.


Race starter St.Thomas Drags Rod-side Aylmer On Member

Status: Offline
Posts: 1409
Date:
Permalink  
 

You will be cruising before you know Marten!!! Nice work smile


junior


__________________

Government is a broker in pillage, and every election is sort of an advance auction sale of stolen goods. HL Mencken. 1919.

"If you want a vision of the future, imagine a boot stamping on a human face - forever." George Orwell 1984


Kemptville Ont Carpenter/Renovations

Status: Offline
Posts: 582
Date:
Permalink  
 

Junior wrote:

You will be cruising before you know Marten!!! Nice work smile

 Thanks Junior.  "Hoping" to have it on the road this summer.  Got to have some goals or nothing happens.


junior


__________________

Building my dream one piece at a time.


Kemptville Ont Carpenter/Renovations

Status: Offline
Posts: 582
Date:
Permalink  
 

With the AC system almost done it was time to move to the wiring. Bought a kit from Speedway, their 22 circuit one.   Because I could not figure out how to mount in my gauge panel that I built earlier it turned out to be a bonus for the start of installing this.  Mounted the fuse panel and then needed a way of installing the relays.  Made up a bracket and welded in to the fire wall.  These pictures are taken through the hole where the gauges will be.

20210124_161504.jpg

What a jungle of wires.  Not sure what to do so I just picked on a couple of wires and started moving them around.

20210124_161519.jpg

Hoping this works out when things are done.  

Kind of looks like a truck now.

20210125_184304.jpg

Will Ford guys get mad at me?

20210125_184338.jpg

Waiting for a couple of AC fittings and then I can finish off the hoses.


Attachments
__________________

Building my dream one piece at a time.


St.Thomas On Rod-side member

Status: Offline
Posts: 495
Date:
Permalink  
 

Lookin good Marten. Should be ready for the street when we get nice weather.

__________________

if you don't like the way I drive, stay off the sidewalk.


Kemptville Ont Carpenter/Renovations

Status: Offline
Posts: 582
Date:
Permalink  
 

So apparently I can mess up just about anything.  My lack of knowledge came back to bit me again.  The plastic crimp on connectors are not good to use.  Future knowledge for someone I hope.

Anyway, my brother came up a couple of weeks ago to give me a hand and show me a better way to make connections.  He helped me rework most of the wiring.  Great help for sure.  I have been chipping away at it and got it 95% done now.  Need to pick up some wire to finish off the power seats and windows.  Connected the battery, put in the fuse for the lights only.  You should do this one fuse at a time.  Another thing I learned.  Opps butterfly moment, lol.  Back to it, fuse in and pulled the switch for the lights and got this.

20210213_112505.jpg

20210213_105222.jpg

What an incredible feeling of success.  It worked no problem at all.  Yes called my brother right away, lol.

Tested the signal lights, brake lights , electric fan, 4 ways, and bumped the started, all working.


Attachments
__________________

Building my dream one piece at a time.


Race starter St.Thomas Drags Rod-side Aylmer On Member

Status: Offline
Posts: 1409
Date:
Permalink  
 

Nice work Marten!!


junior


__________________

Government is a broker in pillage, and every election is sort of an advance auction sale of stolen goods. HL Mencken. 1919.

"If you want a vision of the future, imagine a boot stamping on a human face - forever." George Orwell 1984


Kemptville Ont Carpenter/Renovations

Status: Offline
Posts: 582
Date:
Permalink  
 

My kids surprised me as well.  It has been a running joke that the truck is as much a Corvette as an old Ford pick up.  They sent me this.  It was always in the plans to do something like this but down the road.   For now it is on with tape but will become permanent once the truck is painted.

20210127_194043.jpg

Thanks for peeking in.


Attachments
__________________

Building my dream one piece at a time.


Tin basher Metal shaping guy

Status: Offline
Posts: 414
Date:
Permalink  
 

Good stuff Marten.

__________________

PUGSY


Kemptville Ont Carpenter/Renovations

Status: Offline
Posts: 582
Date:
Permalink  
 

So with 4 years of high school drafting, 4 years of high school woodworking.  2 years in collage for a technician degree. Been woodworking since we got married, 31 years ago.  A son that spent 3 years in collage for architecture.  Access to all the free software and graphic design I could ever need to design stuff I use....................................cardboard to design my running boards and center console, go figure.

20210314_111911.jpg

20210314_111927.jpg

20210226_122130.jpg

With this as a plan, I will order up material and start building.  Space between shift and arm rest is for 2 drink holders.


-- Edited by Marten on Wednesday 17th of March 2021 08:41:44 PM

Attachments
__________________

Building my dream one piece at a time.


http://lightspeedmetaldesign.com/

Status: Offline
Posts: 307
Date:
Permalink  
 

It's called CAD Marten
Cardboard
Aided
Design


__________________


Kemptville Ont Carpenter/Renovations

Status: Offline
Posts: 582
Date:
Permalink  
 

Waiting for some parts to come for the outside so work continues on the inside.  Picked up some 3/4" plywood and transferred the cardboard design to wood and started cutting.  then along comes architecture son and says "you should build it out of cherry to tie in the box to the cab".  So a small change in plans and the top part where the shifter and cup holders are became cherry.  Need to pick a spot for the window switches and power outlets.  Everything is tight but fits.

20210321_170420.jpg

20210321_170428.jpg


Attachments
__________________

Building my dream one piece at a time.


Kemptville Ont Carpenter/Renovations

Status: Offline
Posts: 582
Date:
Permalink  


Been a while since my last update. The struggle bus showed up at my place and I had to sit in the back row. I have been working on several things but not getting far. I have decided to go with a forward tilt hood set up but have been having a hard time getting the hood, cab and fenders to all line up. The fenders will be coming off to see what else I can do but this is what it looks like now.

20210403_170953.jpg

I did get the seatbelts in, thanks to one of my sons coming down for the weekend a while ago.  That was a success.  Figures, a sideways picture.  No idea why this happens.

20210602_204326.jpg

The console has been another struggle.  Up to my third attempt to make it all work.  The challenge has been the power window switches.  I could not get them to stay put.  Talked to tech support from the manufacture.  They told me "we don't recommend that type as they don't stay in, we recommend this other type" really.  The said because I have bought some other ones, they would sell me the new ones at cost.  More money, plus shipping and duty, gurrr.

Been working on interior door locks as well.  Finally got it.  Cut up some metal and painted it with Tremclad rust paint.

20210524_132617.jpg

Good thing I have cut some extra holes in my doors.  Got things welded in.  Used some connecting rods from the donor door and handle to connect everything up.  The horizontal bar you see is connected to my interior door handle.  Everything fits but is tight.

20210524_152324.jpg

Success.  They work great.

20210524_165705.jpg

Work continues on the power windows.  The drivers side works great.  The passenger side was another struggle.  I think I got it now, well at least the last time I was in the shop they were working.  I think I have pictures of them earlier.

Got my interior lights working, thanks to Lightspeed Mike for all the help and info for that.  They work differently then the rest of the electrical system.  Glad I got it though.

20210425_153904.jpg 

Thanks for peaking in.


Attachments
__________________

Building my dream one piece at a time.


http://lightspeedmetaldesign.com/

Status: Offline
Posts: 307
Date:
Permalink  
 

Happy to help Marten.
Some steps are small, some are big, some are very steep. But as long as you're moving , you're making progress.
Thanks for the updates, keep up the good work.


__________________


St.Thomas On Rod-side member

Status: Offline
Posts: 495
Date:
Permalink  
 

Looks real good, Marten

__________________

if you don't like the way I drive, stay off the sidewalk.


Tin basher Metal shaping guy

Status: Offline
Posts: 414
Date:
Permalink  
 

You're really moving along Martin.

Pics; if you're running Windows and saving to a folder: Rotate the picture in the folder and then close the folder. The next time you open the folder it will be "stuck" that way.

__________________

PUGSY


Kemptville Ont Carpenter/Renovations

Status: Offline
Posts: 582
Date:
Permalink  
 

123pugsy wrote:

You're really moving along Martin.

Pics; if you're running Windows and saving to a folder: Rotate the picture in the folder and then close the folder. The next time you open the folder it will be "stuck" that way.


 I thought about that, but they are correct in my folder. I guess I have to change them there and resave. Some websites are fine. 


__________________

Building my dream one piece at a time.


Kemptville Ont Carpenter/Renovations

Status: Offline
Posts: 582
Date:
Permalink  
 

Got my bed wood into clear finish and started the install.  5 coats of gloss spar urethane thinned about 30%  4 coats applied with a cotton rag, light sanding to remove dust nibs, etc. and then a final coats.  Smooth like glass.  Needs to be completely bolted down but will not change the look from this.  Really like the way the wood came to life after the finish was done.

20210701_174431.jpg

20210701_174447.jpg

20210701_174500.jpg


Attachments
__________________

Building my dream one piece at a time.


http://lightspeedmetaldesign.com/

Status: Offline
Posts: 307
Date:
Permalink  
 

Looks super Marten, Really nice finish!!

__________________


St.Thomas On Rod-side member

Status: Offline
Posts: 495
Date:
Permalink  
 

OH YAA

__________________

if you don't like the way I drive, stay off the sidewalk.

«First  <  1 2 3  >  Last»  | Page of 3  sorted by
 
Quick Reply

Please log in to post quick replies.


Create your own FREE Forum
Report Abuse
Powered by ActiveBoard