
| Post Info | TOPIC: box building | ||||||||
|---|---|---|---|---|---|---|---|---|---|
|
Kemptville Ont Carpenter/Renovations

|
|
||||||||
|
Mississauga On Rod-side Member Ford guy
|
|
||||||||
|
Belle River On Ford Member
|
|
||||||||
|
Courtice On Rod-Side Member Pin Striper
|
|
||||||||
|
Komoka On, Board recruiter, Good will embassador Rod-side Member
|
|
||||||||
|
Courtice On Rod-Side Member Pin Striper
|
|
||||||||
|
Courtice On Rod-Side Member Pin Striper
|
|
||||||||
|
Kemptville Ont Carpenter/Renovations
|
|
||||||||
|
http://lightspeedmetaldesign.com/
|
|
||||||||
|
Haliburton Ont Member
|
|
||||||||
|
Belle River On Ford Member
|
|
||||||||
|
St.Thomas On Rod-side member
|
|
||||||||
|
"Fatchuk" Rod-side member Board administration & clean up guy
|
|
||||||||
|
Kemptville Ont Carpenter/Renovations
|
|
||||||||
|
Carleton Place On Rod-Side Member
|
|
||||||||
|
Mississauga On Rod-side Member Ford guy
|
|
||||||||
|
Kemptville Ont Carpenter/Renovations
|
|
||||||||
|
Komoka On, Board recruiter, Good will embassador Rod-side Member
|
|
||||||||
|
Mississauga On Rod-side Member Ford guy
|
|
||||||||
|
Mississauga On Rod-side Member Ford guy
|
|
||||||||
|
Kemptville Ont Carpenter/Renovations
|
|
||||||||
|
Belle River On Ford Member
|
|
||||||||
|
"Fatchuk" Rod-side member Board administration & clean up guy
|
|
||||||||
|
Etobicoke On Rod-side Member
|
|
||||||||
|
"Fatchuk" Rod-side member Board administration & clean up guy
|
|
||||||||
|
Hensall Ont Member
|
|
||||||||
|
Campbellford On Rod-side Member Licence Plate restoration Chris Stapley Kustoms For U
|
|
||||||||
|
Hydraulic Service Dundas On
|
|
||||||||
|
Kemptville Ont Carpenter/Renovations
|
|
||||||||
|
"Fatchuk" Rod-side member Board administration & clean up guy
|
|
||||||||
|
Kemptville Ont Carpenter/Renovations
|
|
||||||||
|
Carleton Place On Rod-Side Member
|
|
||||||||
|
Wellesley, on Member
|
|
||||||||
|
St.Thomas Ont Member
|
|
||||||||
|
Kemptville Ont Carpenter/Renovations
|
|
||||||||
|
Brantford Ont Member He is that Chevy-Guy
|
|
||||||||
|
Oshawa Ont member
|
|
||||||||
|
Kemptville Ont Carpenter/Renovations
|
|
||||||||
|
Carleton Place On Rod-Side Member
|
|
||||||||
|
Kemptville Ont Carpenter/Renovations
|
|
||||||||
|
Oshawa Ont member
|
|
||||||||
|
Courtice On Rod-Side Member Pin Striper
|
|
||||||||
|
Kemptville Ont Carpenter/Renovations
|
|
||||||||
|
Kemptville Ont Carpenter/Renovations
|
|
||||||||
|
Komoka On, Board recruiter, Good will embassador Rod-side Member
|
|
||||||||
|
Kemptville Ont Carpenter/Renovations
|
|
||||||||
|
Komoka On, Board recruiter, Good will embassador Rod-side Member
|
|
||||||||
|
Kemptville Ont Carpenter/Renovations
|
|
||||||||
|
Oshawa Ont member
|
|
||||||||
|
Carleton Place On Rod-Side Member
|
|
||||||||
|
|||||||||

 ......I mean so we can encourage you ! I know I'll learn something .
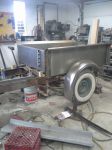
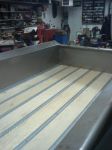
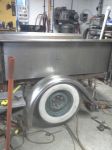
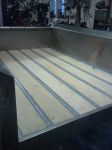
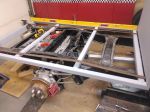
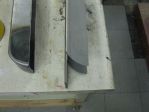
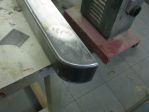
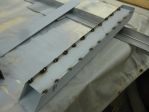
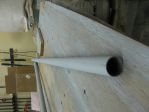
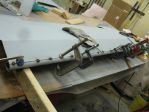
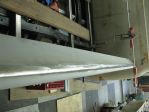

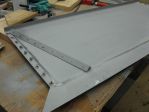
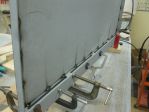
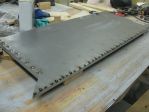
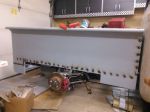
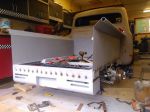
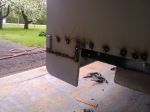
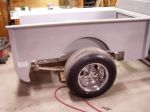
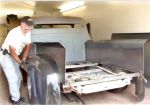
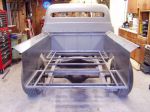
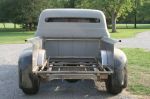
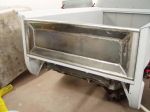
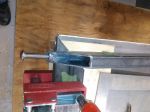
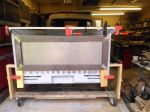
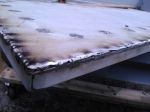
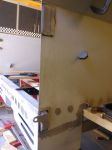
 build and install a new box, ready for paint. Will only cost you the material. But I do need the keys so I can move it around

|
|
||
